 NEWSLETTER
Apple Invites application is a simple way to gather an event invitation directly from its iPhone or web browser. The application is free to download from the App Store, and technically does not even need an iPhone or an Apple account for an RSVP to an event.
If you want to create your own invitations, it must be a Icloud+ Subscriber, but the entrance barrier is relatively low. The subscription is included in Apple's Apple One plans (the package that includes things like Apple TV+, Apple Music and Apple News+), and can also pay it separately from $ 0.99 per month. ICLOUD+ subscriptions obtain additional cloud storage, a personalized domain for ICLOUD email and Apple's private broadcast function about its new privileges of invitations creation.
What are Apple's invitations?
Apple Invites is Apple's attempt to offer event planning and invitation creation invitation Fugitive either Avoid. The application allows you to create and confirm your assistance to events, and includes integrations with other Apple services, such as Apple Music collaborative reproduction lists and Apple Photos shared albums. The invitations also admit the image playground if you want to use ai to create an image for your invitation, instead of trusting Apple's built -in options or one of your own photos.
How to create an event invitation with Apple's invitations
To create an event invitation with Apple invitations, you must go to Icloud website or have an iPhone with iOS 18 or later with The invites installed application. To take advantage of the integration of invitations with Apple Intelligence, you will also need an iPhone that admits the function (an iPhone 15 Pro and UP).
To create your event, first open the Apple Invites application. Then, touch “create an event” if it is the first time you open the application or the small “+” in the upper right corner of its screen if you already have events that you have made or have been invited. Then you should see an empty invitation screen.
From here, touch “add back” and select from the prefabricated Apple (emoji, photographic and color options) or a new photo, an image of your photo library or a creation of image games playing one of the circular icons At the top of the screen.
Then, you will want your event by taking advantage of the “title of the event” and writing what you want to call it. Apple also allows you to choose between four different sources options to add an additional style. Touch “date and time” to choose the day and time. The event begins and ends, then touch “Location” to search and select the location where you will host your event. You can also name the location if you wish. Finally, by touching “add a description”, you can add a description of the event with additional information and enter a separate host name if you prefer that the invitation not show your name and surname.
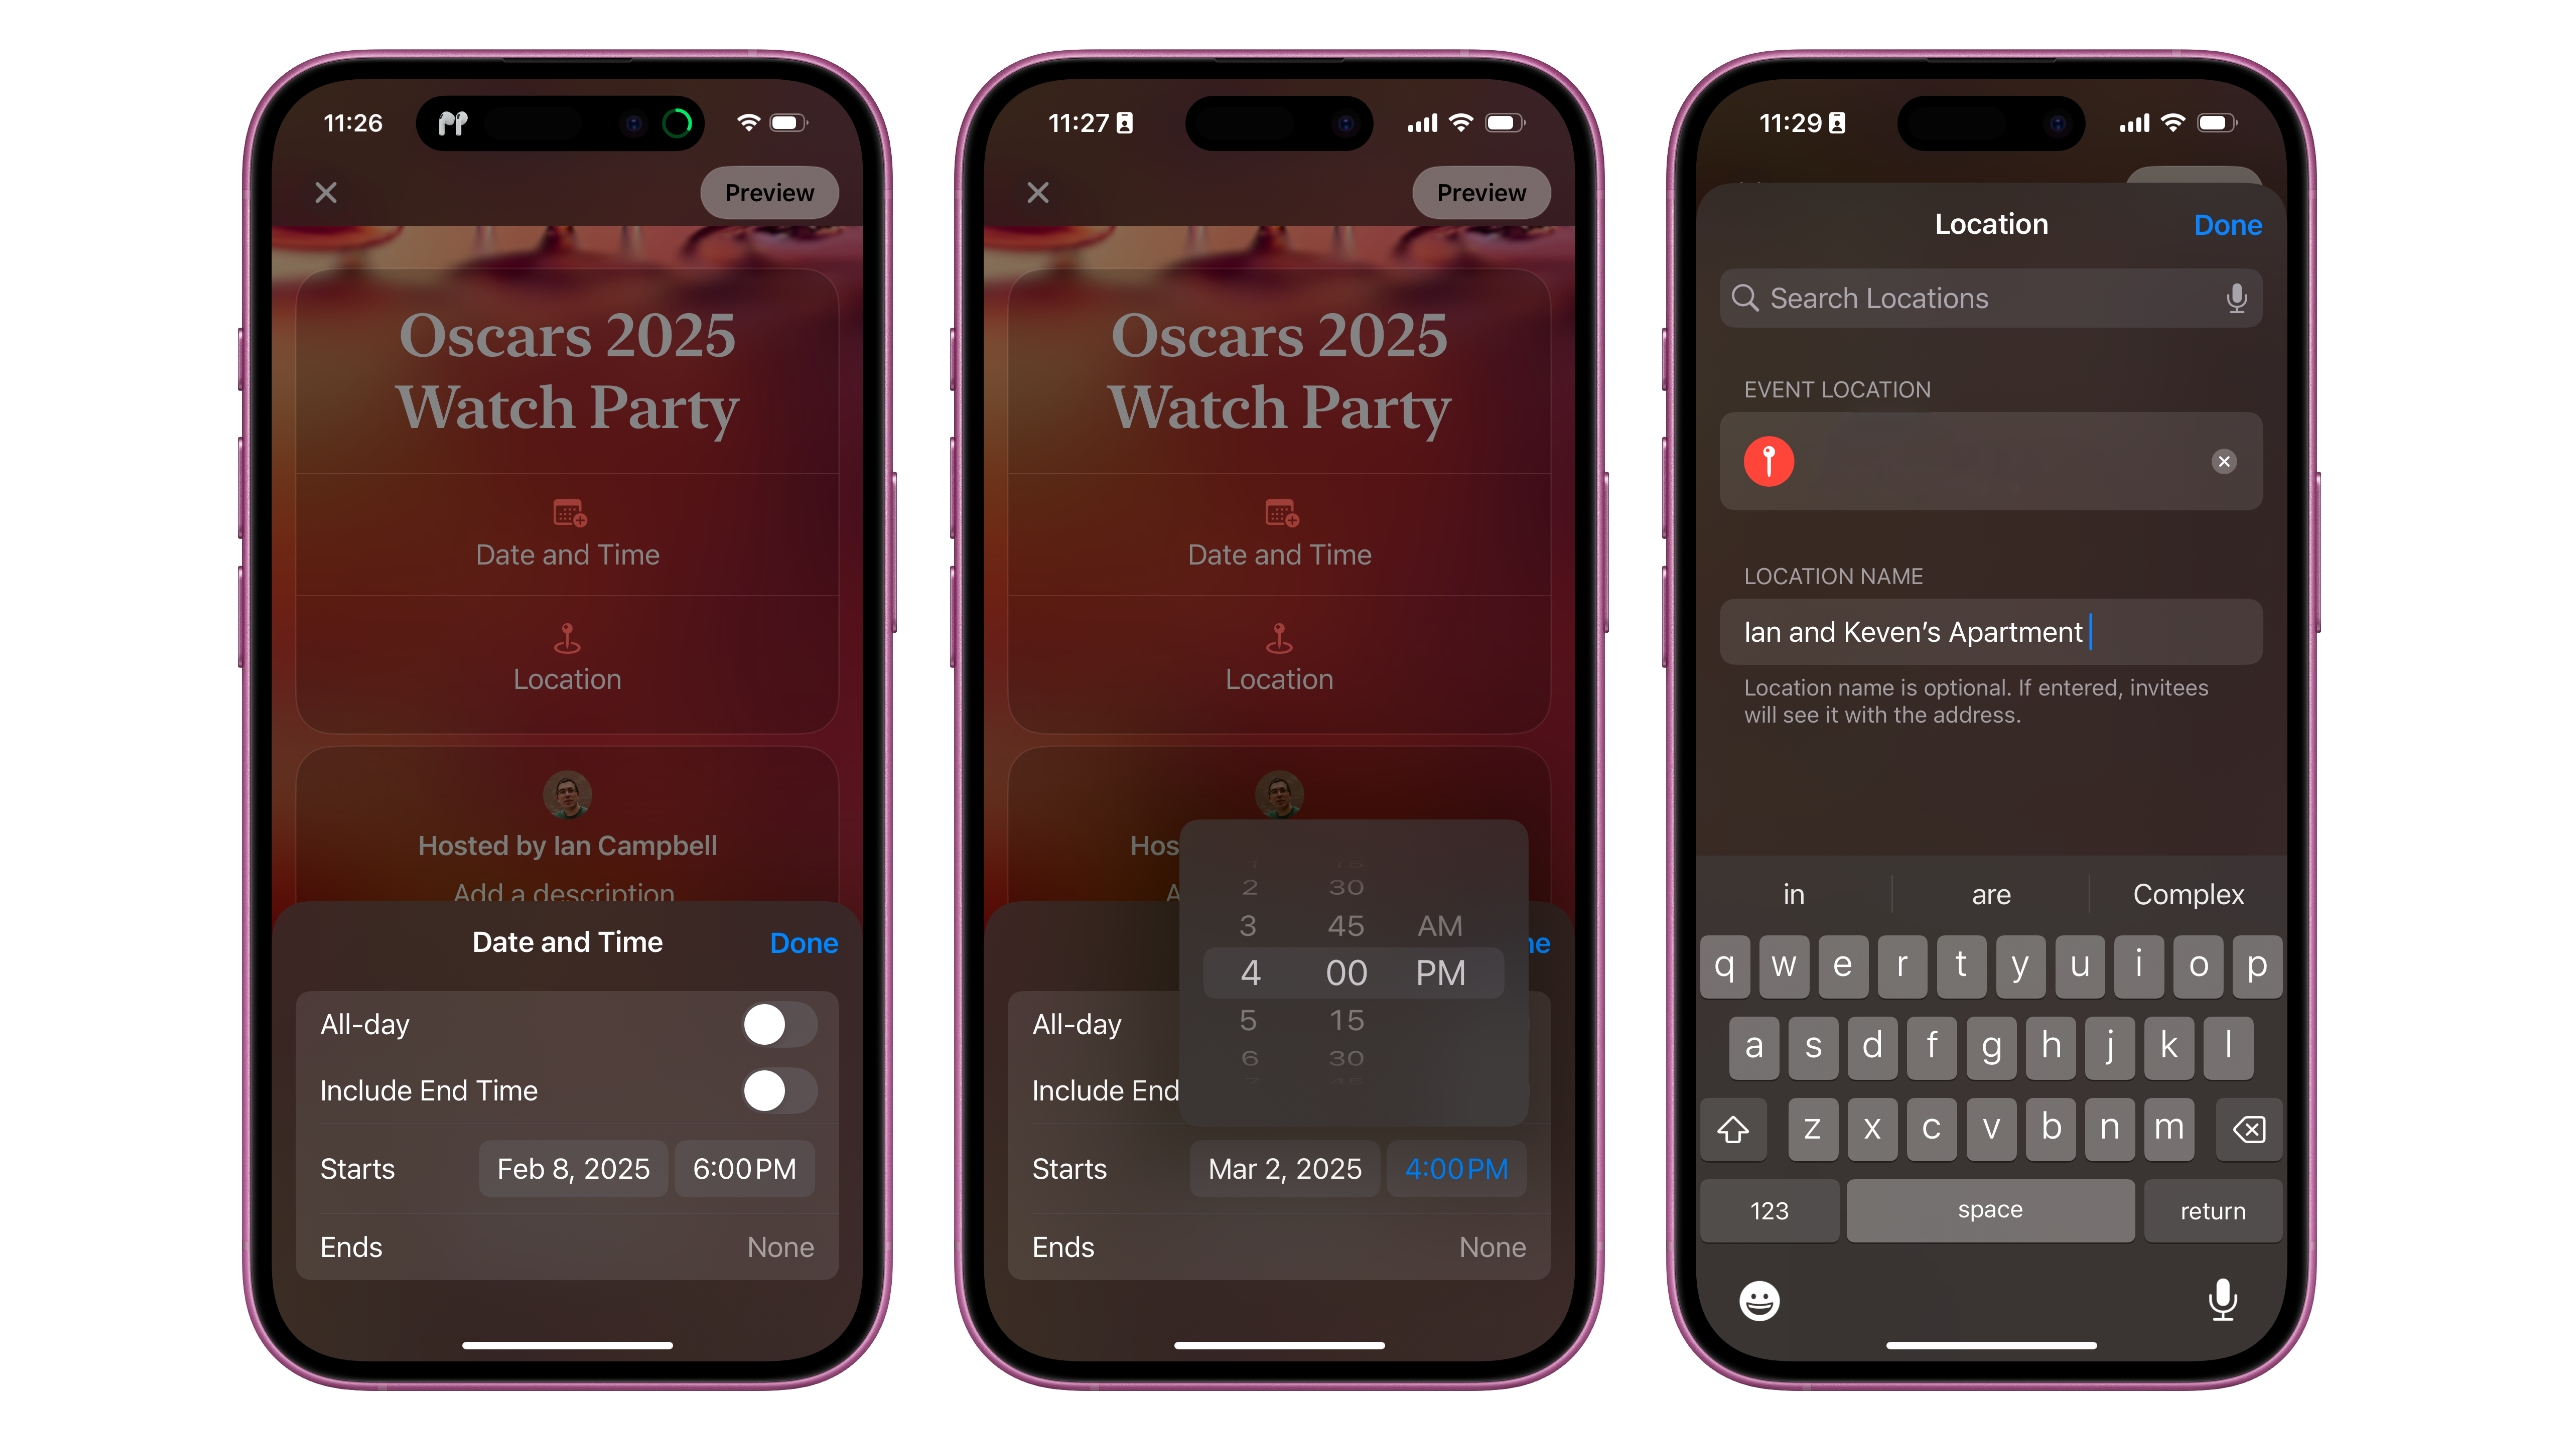
Those are the basic concepts that you need to complete for an invitation, but the invitations include two other specific characteristics of Apple software. By taking advantage of “creating album”, you can create a shared photo album to which guests can add during the event and access later. The name of the album will be the name of the event, but you can enter a new name with the name of the album and touch “Done” if you want to save your changes.
You can also play “add playlist” to create a shared playlist to which guests can add songs before and during the event. You will have to select an existing playlist or create a new one from scratch. If you create a playlist, you will have the name of your event by default with the option of editing it if you wish.
Once you have finished creating your invitation, to see how you look for the guests, touch “preview” in the upper right corner and then “next” to begin inviting the guests.
How to invite guests to an Apple Invites event
Once your event invitation is created, you can start sending it to your guests a couple of different ways. You can send the invitation as a public link or invite individual people from your contact list. Within your invitation, touch invite guests to start sending their invitation.
If you touch the messages or email icons, you can send a link to your invitation through those respective applications. By touching “Sharing Link”, you can share a link to the invitation through any application on your iOS Share Sheet. And if it touches the “copy link”, its invitation link will be copied on its clipboard so you can paste it anywhere.
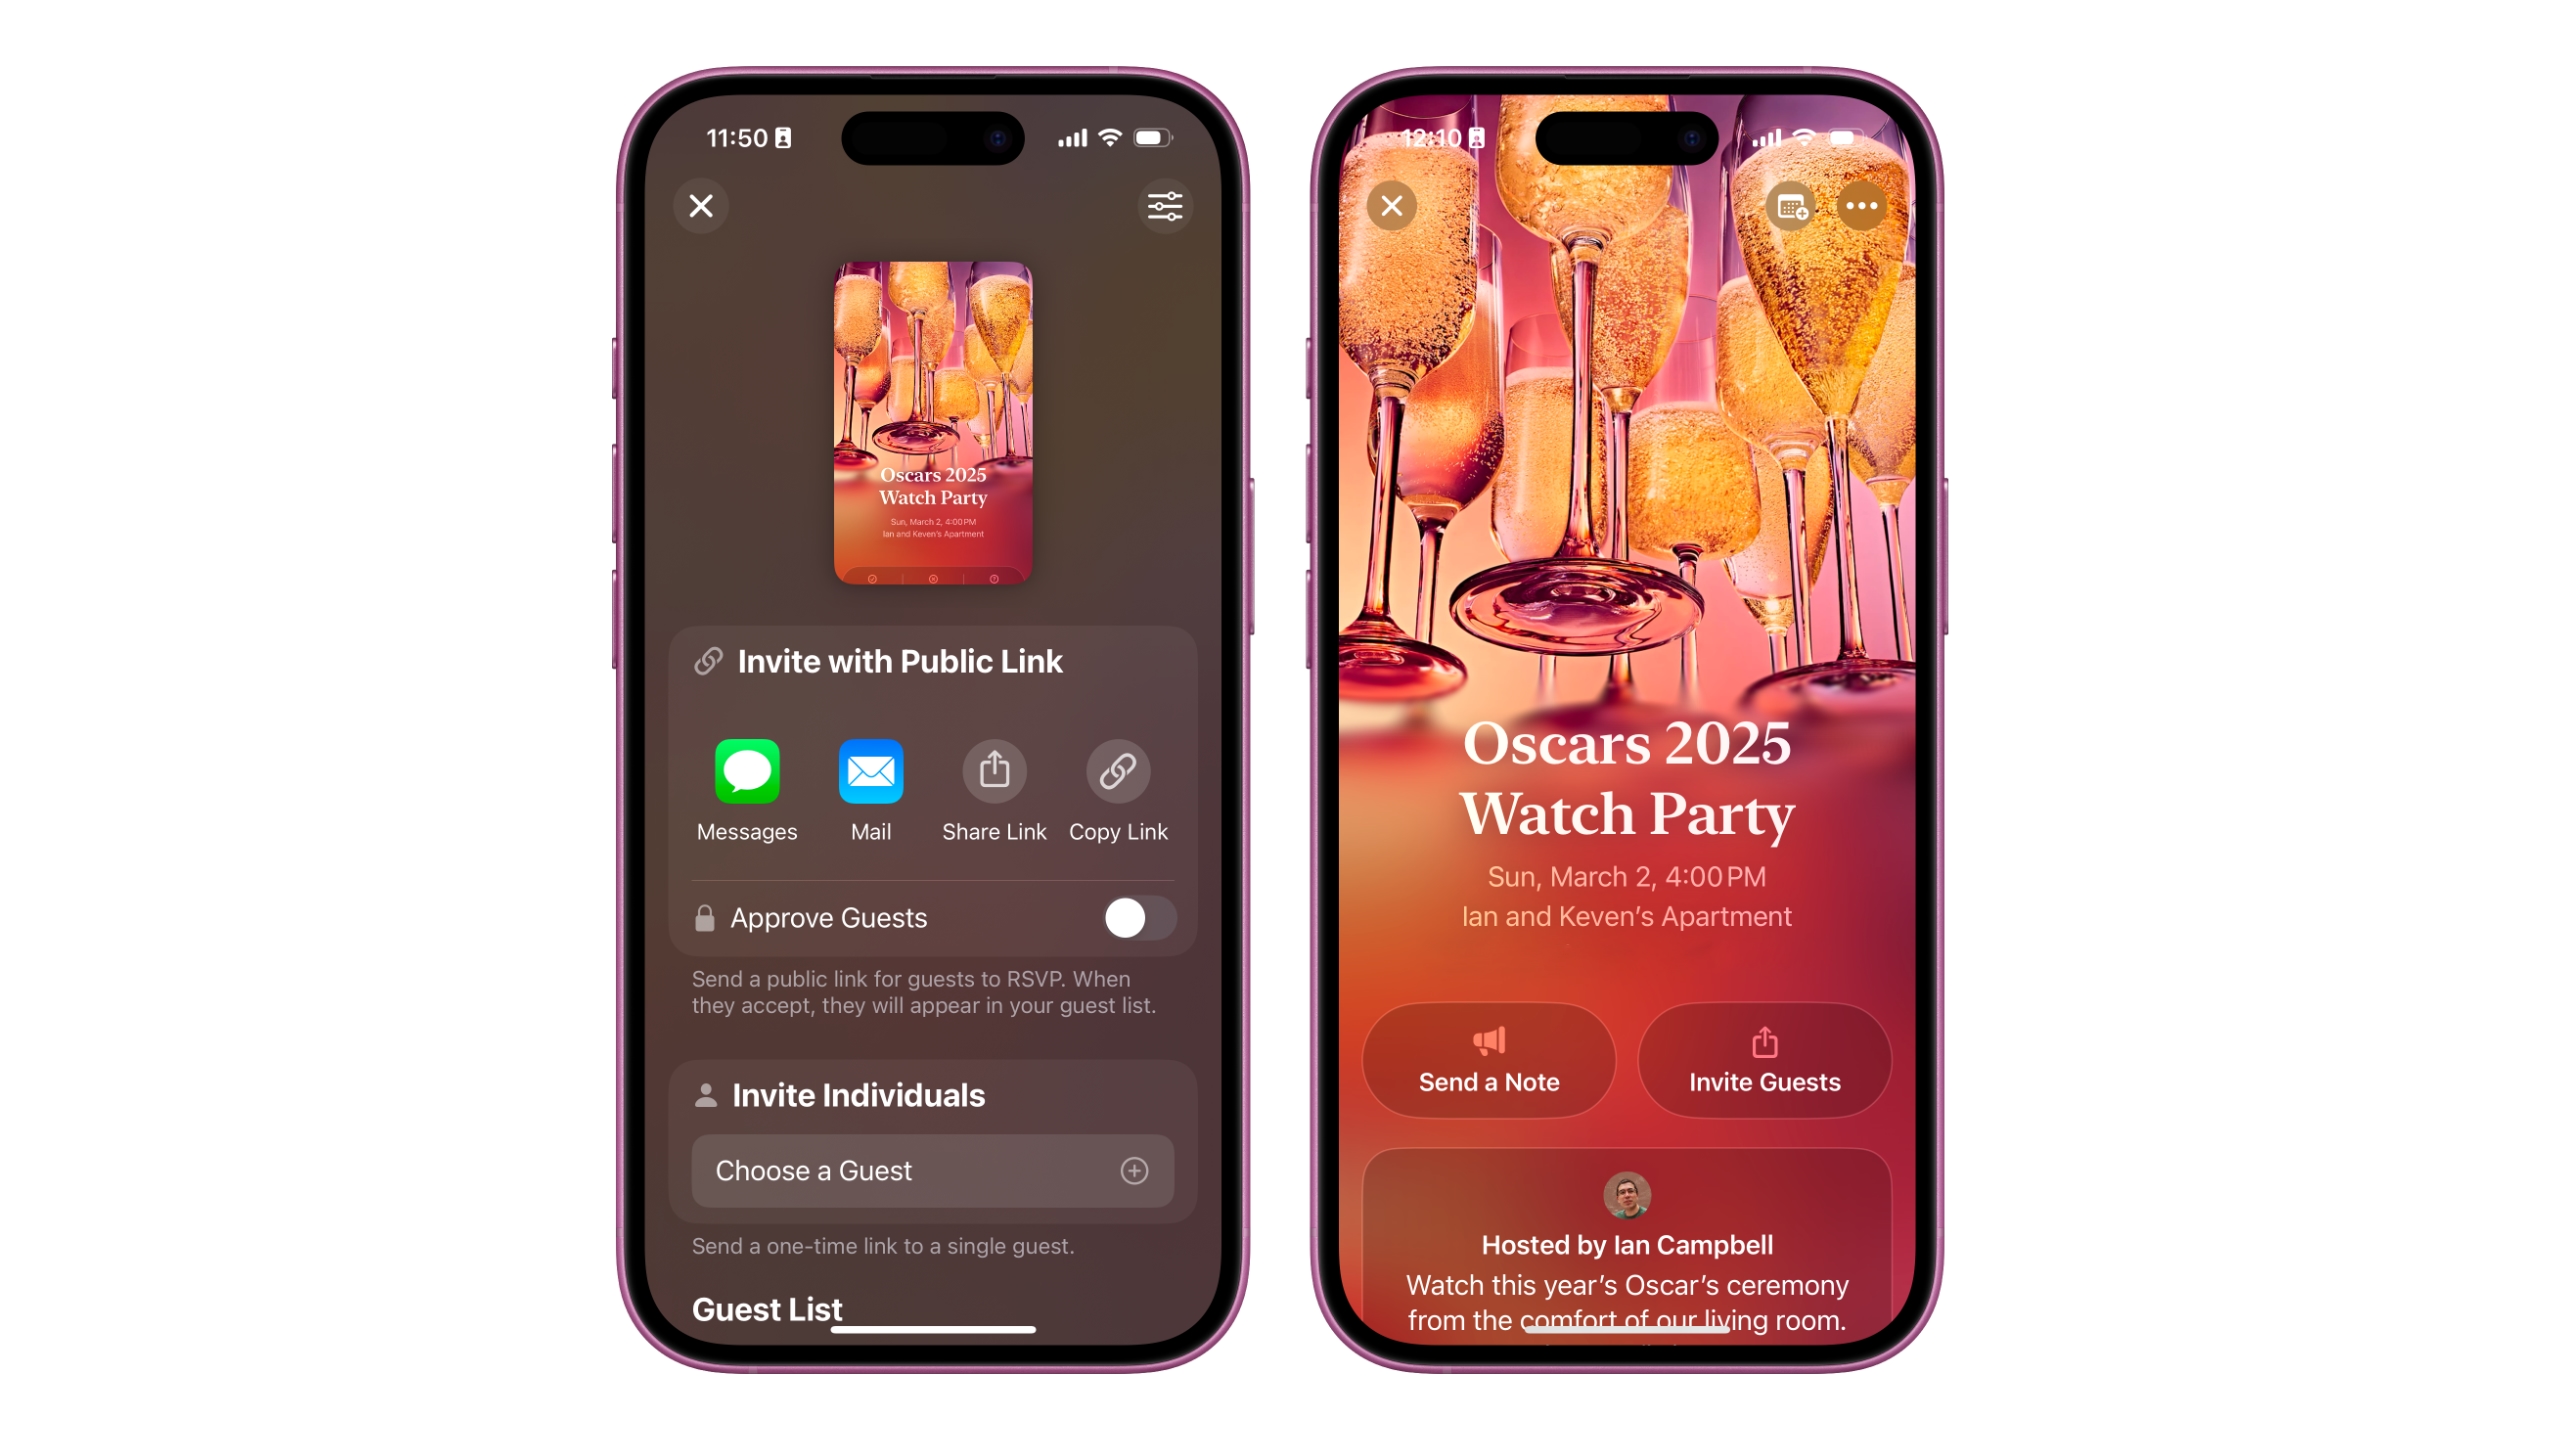
You can also send a unique link to individual guests taking advantage of “choose a guest.” Apple Invites will request access to your contacts and then show each contact you have saved. Touch one to share a unique invitation link through messages, mail or the iOS sharing sheet. Unlike public links, these links can only be used once.
How to send a note to the guests of an Apple Invites event
If you want to update your guests in information about your event or remind them of something you might need, you can send anyone who has invited a note directly through the Apple Invites application. From your invitation, touch “Send a note” and then enter the text you want to send and touch “Send note”.
How to delete an Apple invitation event
If you need to cancel your event, you can delete it by playing the event and then playing the three -point menu in the upper right corner. Touch “event configuration”, then move down and touch “delete event”. Confirm that you want to eliminate the event playing “delete event”.
This article originally appeared in Engadget at https://www.engadget.com/apps/how-to-use-apple-invites-to-plan-your-next-event-204503849.html?src=rsss


