Assemblr EDU is a tool designed to help make education more engaging for students while requiring less preparation time for educators.
While they may seem like two things that are opposed to each other, the way this tool was designed allows it to be very simple to use. However, it can offer complex and immersive 3D and AR designs to aid in teaching.
Assemblr EDU delivers 3D models on a screen that you can manipulate with your mouse or touch controls. So, from looking inside a human body to exploring the edge of a volcano, there are many ways to use this imaging tool.
Read on to find out if and how this can be useful in your classroom.
What is Assembler EDU?
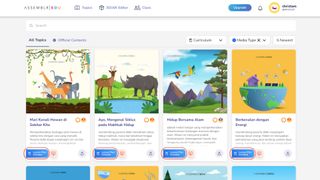
EDU Assembler is a 3D imaging and AR tool that not only allows educators and students to create and edit graphics but also use pre-designed content with ease.
It's packed with lesson-friendly pre-built content for teachers, allowing 3D images to be shared in class. Or overlay digital images, while using a camera device, on the real world. So a class could see and manipulate a virtual human heart, just as if it were on the table, only with much less mess and cost.
This tool also allows students to create and edit images. For example, creating a 3D scene that can then be overlaid on the real world using a camera. This not only allows for great creativity but also the opportunity to play and learn from whatever they are creating, whether it be animals, plants, words or more.
How does Assemblr EDU work?
Teachers can use Assemblr EDU as a way to create teaching resources that students can interact with in 3D or AR. Or teachers can do this on a large screen, as a way to lead the class as a group.
It works as an app, so it can be used on smartphones and tablets as an interactive 3D and augmented reality experience. Thus, students can use a shared classroom device, or their own smartphones, as a way to create and manipulate an object as if it were physically there.
The editor works to have students create images. So instead of moving around and reading about a teacher-shared creation (perhaps of an animal), they can create their own scene. This works using drag and drop controls with a selection of preloaded materials, making it very simple and fun to use.
The creation can be shared publicly, so everyone can access it, or privately for use in class, or as a way to submit work directly to a teacher.

What are the best features of Assemblr EDU?
Assemblr EDU has a ton of pre-built content, making it very easy to use and quick to go from nothing to sharing with the class. For example, you can select the Bone Structures option and have students choose from several types of bone that can be magnified, moved, and annotated to explore at many levels.
This makes it a really useful way to teach visually, ideal for more abstract ideas or anything totally new to the class. Since visual processing is 60,000 times faster than text, according to the company, it should mean easier adoption for the classroom. This can also be a useful way to reach students who would otherwise struggle with traditional text-based teaching techniques.
The app is very intuitive, so most teachers and even younger students can use it right away without training. No coding knowledge or even image manipulation training is needed as this platform makes everything very easy with drag and drop controls.
Thanks to the public sharing of creations, there is a huge wealth of ready-made builds to work with available immediately. Students can also create and share their work in a broader sphere than just the classroom or school.

How much does Assemblr EDU cost?
Assemblr EDU offers four pricing options, including a free tier.
He Free Options give you 400 free 3D objects, limited access to themes, limited access to educational kits, 30 MB of storage, and unlimited QR Maker.
Go for him Single level, at $2.99/monthand you get 6000 free and professional 3D objects, unlimited themes, unlimited educational kits, 300 MB storage, 5 custom AR markers and unlimited QR markers.
He Cluster option, in $4.99/monthIt offers you the above but in three accounts.
He School level, at $1/month/useroffers you the above for 60 users plus 60 custom AR markers.
Best Assemblr EDU Tips and Tricks
Introduce
Start a new topic with a visual introduction that allows students to grasp the idea before diving into greater complexity during the lesson and beyond.
Create
Set a task for students to create an AR model of an object they are learning about and then have them play with each other's creations in class.
Teach
Have students present a theme or model they have found or created, explaining it to the class while they model it in 3D or AR.


