 NEWSLETTER
By learning Python, many beginners focus only on language and their libraries while completely ignoring virtual environments. As a result, Python project management can become a disaster: the units installed for different projects can have conflicting versions, which leads to compatibility problems.
Even when I studied Python, no one emphasized the importance of virtual environments, which now finds very strange. They are an extremely useful tool to isolate different projects from each other.
In this article, I will explain how virtual environments work, I will provide several examples and share useful commands to manage them.
Problem
Imagine that you have two Python projects on your laptop, each located in a different directory. You realize that you need to install the latest version of library A for the first project. Later, it changes to the second project and tries to install library B.
Here is the problem: Library B depends on Library A, but requires a different version than the one previously installed.
As you have not used any tool for dependencies management, all dependencies are installed worldwide on your computer. Due to the incompatible versions of Library A, find an error when trying to install library B.
Solution
To avoid such problems, virtual environments are used. The idea is to assign a separate storage space for each Python project. Each storage will contain all the units discharged externally for a specific project in isolation.
More specifically, if we download the same library A for two projects within its own virtual environments, the library A will be downloaded twice, once for each environment. In addition, library versions may differ between environments because each environment is completely isolated and does not interact with others.
Now that the motivation behind the use of virtual environments is clear, let's explore how to create them in Python.
Virtual environments in Python
It is recommended to create a virtual environment in the root directory of a project. An environment is created using the following command in the terminal:
python -m venv By convention, It is generally named deerThen the command becomes:
python -m venv venvAs a result, this command creates a directory called deerwhich contains the virtual environment itself. It is even possible to enter that directory, but in most cases, it is not very useful, such as deer The directory mainly contains system scripts that are not intended to be used directly.
To activate the virtual environment, use the following command:
source venv/bin/activateOnce the environment is activated, we can install dependencies for the project. While the deer It is activated, any installed dependence will only belong to that environment.
To deactivate the virtual environment, write:
deactivateOnce the environment is disabled, the terminal returns to its normal state. For example, you can change to another project and activate your environment there.
Dependency management
Installation of libraries
Before installing any dependence, it is recommended to activate a virtual environment to ensure that installed libraries belong to a single project. This helps avoid global version conflicts.
The most used command for dependency management is PIP. Compared to other alternatives, nugget It is intuitive and simple to use.
To install a library, write:
pip install In the examples below instead of the I will write pandas (the most used data analysis library).
So, for example, if we wanted to download the latest version of pandas, we should have written:
pip install pandasIn some scenarios, we may need to install a specific version of a library. nugget Provides simple syntax to do that:
pip install pandas==2.1.4 # install pandas of version 2.1.4
pip install pandas>=2.1.4 # install pandas of version 2.1.4 or higher
pip install pandas<2.1.4 # install pandas of version less than 2.1.4
pip install pandas>=2.1.2,<2.2.4 # installs the latest version available between 2.1.2 and 2.2.4
See dependency details
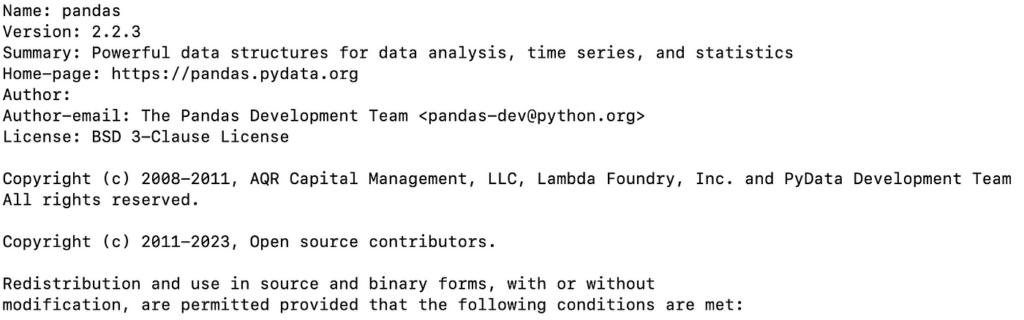
If you are interested in a particular dependence that you have installed, a simple way to obtain more information about it is to use the pip show domain:
pip show pandasFor example, the command in the example will generate the following information:
Eliminate dependence
To eliminate a dependency of a virtual environment, use the following command:
pip uninstall pandasAfter executing this command, all files related to the specified library will be deleted, thus releasing the disk space. However, if you run a Python program that matters this library again, you will find an importer.
Archive with requirements
A common practice when administering dependencies is to create a Requirements.txt Archive that contains a list of all units downloaded in the project along with its versions. Here is an example of how it would look:
fastapi==0.115.5
pydantic==2.10.1
PyYAML==6.0.2
requests==2.32.3
scikit-learn==1.5.2
scipy==1.14.1
seaborn==0.13.2
streamlit==1.40.2
torch==2.5.1
torchvision==0.20.1
tornado==6.4.2
tqdm==4.67.1
urllib3==2.2.3
uvicorn==0.32.1
yolo==0.3.2
Ideally, every time you use the pip install command, you must add a line corresponding to the Requirements.txt Archive to monitor all libraries used in the project.
However, if you forget to do that, there is still an alternative: the pip freeze Command issues all units installed in the project. However, pip freeze It can be quite detailed, often including many other library names that are dependencies of the libraries that you are using in the project.
pip freeze > requirements.txtGiven this, it is a good habit to add requirements installed with your versions to the Requirements.txt file.
Every time a Python project clones, a requirement file is expected to be present in the git repository. To install all the units listed in this file, use the pip install Command together with the indicator -r followed by the requirement file name.
pip install -r requirements.txtOn the contrary, provided that it works in a Python project, you must create a Requirements.Txt file so that other collaborators can easily install the necessary dependencies.
.Gitignore
When working with version control systems, virtual environments should never be pressed for git! Instead, they should be mentioned in a .gitignore file.
Virtual environments tend to be very large, and if there is an existing requirement file, there should be no problems to download all the necessary units.
Conclusion
In this article, we have analyzed the very important concept of virtual environments. By isolating unloaded units for different projects, they allow easier management of multiple Python projects.
All images are from the author unless otherwise indicated.
(Tagstotranslate) Dependency Management (T) Python (T) Python Projects (T) Tips and tricks (T) Virtual Environment


